-
Shop
- Adidas
- Advanced Technologies
- Apple Accessories
- Best-Sellers
- Car Accessories
- Dating & Social Skills
- Digital Resources
- AI Skills
- Beauty
- Car Buying & Ownership
- Cozy Feast Collection
- Dating & Social Confidence
- Electronics & Technology
- Financial Education
- Halloween Digital Collection
- Hobbies
- Home Styling & Organization
- Kitchen & Cooking
- Mindset
- Online Business
- Parenting & Child Development
- Personal Style & Fashion
- Pet Lifestyle & Wellness
- Smart Amazon Shopping
- Smart Life with AI
- Travel Planning
- Wellness
- Yoga & Fitness
- Education & Learning
- Family & Parenting
- Fashion
- Alexander McQueen
- Bags
- Bags & Wallets
- Balenciaga
- Belts
- Blazers
- Blouses & Shirts
- Bottega Veneta
- Brunello Cucinelli
- Burberry
- Chanel
- Chloé
- Dior
- Dolce & Gabbana
- Dresses
- Etro
- Fendi
- Gucci
- Hats & Hair Accessories
- Jacquemus
- Jewelry
- Jil Sander
- Keychains
- Kiton
- Luggage
- Luggage Bags
- Miu Miu
- Off-White
- Outerwear
- Prada
- Rick Owens
- Saint Laurent
- Socks & Tights
- The Row
- Tom Ford
- Valentino
- Valentino Garavani
- Versace
- Vivienne Westwood
- Watches
- Furniture
- Gadgets
- Health & Beauty
- Health & Wellness
- Home & Garden
- Kids & Babies
- Kitchen
- Kitchen & Recipes
- Lighting
- Patio, Lawn & Garden
- Personal Growth
- Pet Care
- Pet Supplies
- Pets
- Shoes
- Sport & Outdoors
- Stress Relief & Relaxation
- Travel
- Wealth
- Popular
- Best deals
Build a Lidar + Vision Robot Tank in Python
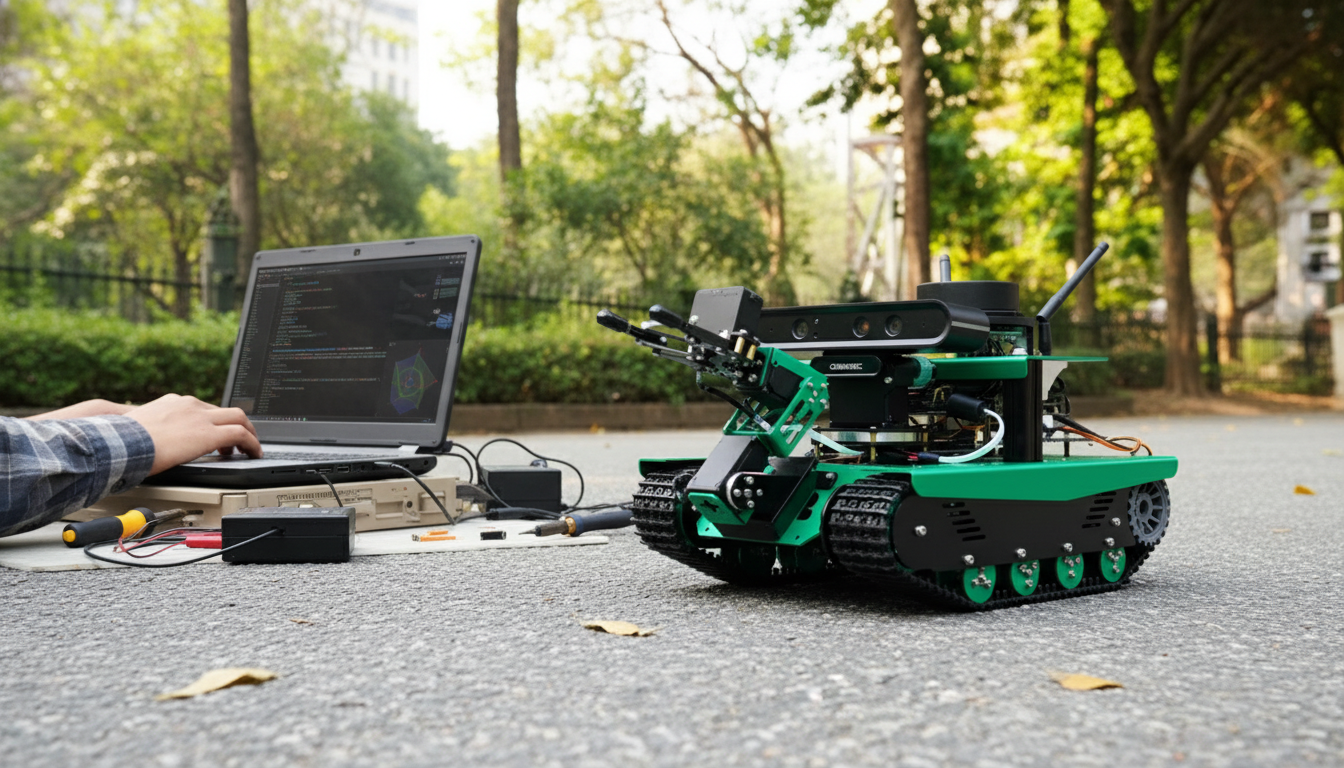
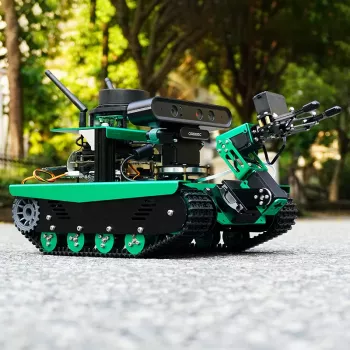
AI Vision Robot Tank Kit with Lidar & Python Programming
A tracked robotics platform is one of the fastest ways to get from concept to real, repeatable autonomy. This AI vision robot tank kit blends lidar ranging and depth-capable vision with Python-friendly control, making it a strong fit for labs, classrooms, robotics clubs, and rapid prototyping. The tank chassis helps stabilize motion over carpet, tile, and small transitions, while sensor-driven behaviors—like obstacle avoidance and mapping—scale from beginner demos to more advanced SLAM and ROS-style workflows.
What This Kit Enables
- Build a tracked robot that perceives its environment using lidar scanning plus a depth/vision stack.
- Prototype autonomous navigation behaviors like obstacle avoidance, waypoint driving, and room exploration.
- Develop Python control logic for sensors, motion, and higher-level autonomy, with a clear path toward ROS integration.
- Create coursework-ready labs and portfolio-grade demonstrations that combine perception and control.
Core Components and How They Work Together
- Tracked tank base: A stable platform with good traction. Most motion control uses differential drive (left/right track speeds) to turn in place and maneuver tightly.
- Lidar: Produces a sweeping set of distance measurements that can be used to detect obstacles, estimate free space, and build 2D maps for localization pipelines.
- Depth camera / vision module: Adds near-field 3D structure and visual cues, supporting behaviors like person-following, marker docking, and object-centric navigation.
- Compute and control layer: Runs Python logic to read sensors, make decisions, and command motors. When structured cleanly, the same modules can later be arranged like ROS nodes (sensors → perception → control).
- Optional add-ons (listing dependent): Some configurations include an arm or expansion ports for additional sensors and actuators, making it easier to evolve from “mobile base” to “mobile manipulator.”
Setup Overview: From Unboxing to First Drive
1) Mechanical assembly and sensor mounting
Before software, aim for a chassis that drives straight and sensors that stay rigid. Confirm track tension, wheel alignment, and secure mounts for lidar and the camera to reduce vibration artifacts that can look like phantom obstacles or shifting depth.
2) Power checks and safe operation
Verify battery voltage range, polarity, and current capability for both motors and compute. Brownouts can cause USB devices to disconnect mid-run, corrupting logs and producing inconsistent sensor timing. Plan a safe cutoff approach (software stop plus a physical kill switch where possible).
3) Connectivity and device enumeration
Establish the provided USB/UART/I2C connections for lidar and camera, then confirm each device appears consistently before writing autonomy code. Stable device IDs and repeatable startup order save hours of debugging later.
4) First motion test (slow and controlled)
Start with low-speed open-loop driving to validate motor direction and turning behavior. If encoders are included, add closed-loop corrections after basic directionality is verified. Keep early tests slow—good autonomy depends on reliable sensing, and high speed amplifies motion blur and wheel slip.
5) Sensor sanity checks
Plot a few lidar scans and view a live camera stream to confirm frames arrive consistently and the coordinate orientation is understood. A small coordinate mistake (left/right flipped, radians vs degrees) can make navigation appear “random” even when the code is otherwise correct.
Programming Pathways: Python-First With a ROS Upgrade Route
Python control loop fundamentals
A practical starting point is a fixed-rate loop: read sensors, update a state machine, and write motor commands. The state machine can begin as simple “forward until obstacle” logic, then expand to behaviors like turn selection, recovery, and waypoint transitions.
Perception building blocks that work well on a tank platform
Navigation behaviors to implement next
Structure for an easy ROS migration
Even if ROS isn’t used on day one, keep modules separated: sensor interfaces, perception, and control outputs. That separation maps naturally to ROS concepts later (topics/services/actions). Helpful references include the ROS Documentation, plus vision tooling from the OpenCV Documentation and core language guidance in the Python Documentation.
Project Ideas That Showcase Lidar + Vision
Key Specs and Selection Notes
Quick Checklist for Evaluating a Robotics Tank Kit
| Area | What to verify | Why it matters |
|---|---|---|
| Mobility | Track traction, motor torque, turning radius | Determines where the robot can operate and how stable mapping will be |
| Sensing | Lidar scan rate, depth camera frame rate, mounting rigidity | Affects obstacle detection reliability and navigation smoothness |
| Compute | Supported OS/tools, Python compatibility, available ports | Impacts development speed and integration with libraries/ROS |
| Power | Battery capacity, regulator quality, safe charging workflow | Prevents brownouts that cause sensor dropouts and corrupted data |
| Expandability | GPIO/UART/I2C/USB access, mechanical mounting points | Enables additional sensors, arms, grippers, or custom payloads |
Recommended Use Cases and Who It Fits
In-Stock Picks
- AI Vision Robot Tank Kit with Lidar & Python Programming
- Modern 2-Tier Faux Marble Coffee Table with Gold Metal Frame
- Calvin Klein Women’s Black Zip Tote Bag
FAQ
How to use VEX AI Vision sensor
VEX AI Vision is part of a separate ecosystem, but the general workflow is similar: mount the sensor securely, calibrate and test in controlled lighting, define detection classes/targets, then stream detection results into your control code to drive behaviors. Use the official VEX setup utility and API documentation to confirm exact configuration steps and data formats for your specific sensor model.
Does lidar replace a camera for navigation?
No—lidar and cameras are complementary. Lidar excels at geometry and reliable distance-to-obstacle measurements, while cameras are better for recognizing objects, markers, and semantic cues; combining them typically yields safer, more capable navigation.
What level of Python is needed to start?
Basic Python is enough: functions, loops, simple classes, and comfort installing packages and reading device data. A good path is to start with a teleop driving script, then add sensor-driven behaviors using a small state machine that grows over time.
Recommended for you


VEX AI Vision Sensor Setup: Mount, Calibrate, Code
May 26, 2026


Leave a comment